

I am a music lover! I have loved music for as long as I can remember, and because of that, I’ve amassed quite the archive of analog (vinyl records, cassettes, etc…) and digital recorded music. Recently, I was on the phone with a friend of mine and casually mentioned that I was ripping some CDs to FLAC and MP3 formats. He knew that the Apple Music app doesn’t support FLAC so he asked how I was doing it and what software I used. I told him that I use Audacity and explained the following process.
Install Audacity

If you’re not already an Audacity user, you’ll need to download and install Audacity from the official website. This tutorial uses Audacity 3.6.1.
Install the Required Libraries
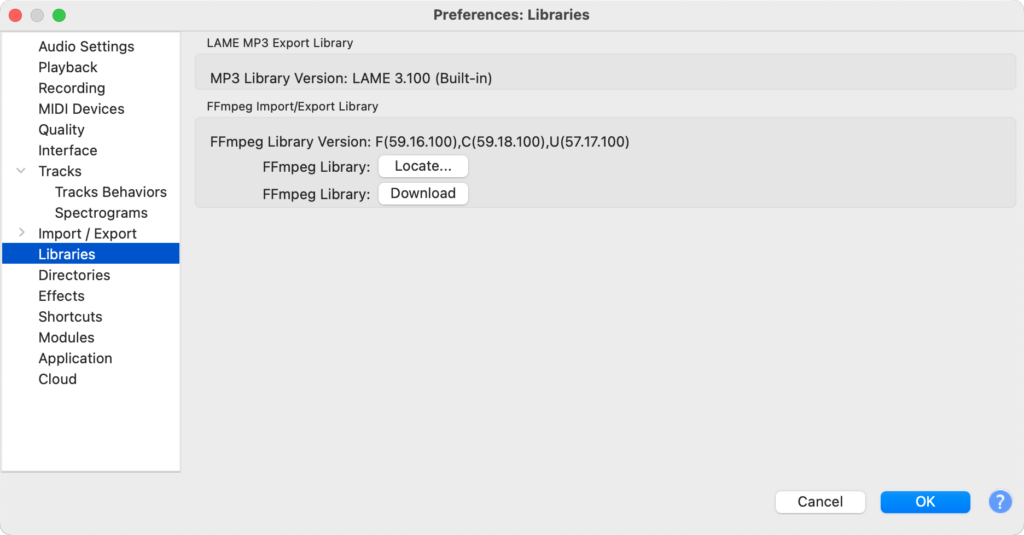
FFmpeg is a library that allows you import/export additional audio file formats, such as FLAC and others into/from Audacity.
- Go to `Edit > Preferences` (or `Audacity > Preferences` on macOS).
- Select the `Libraries` tab and ensure that FFmpeg is properly installed. If not, follow the instructions to install it.
Insert the CD
Insert the CD into your computer’s CD drive. Don’t skip this step. It’s VERY important. 🙂
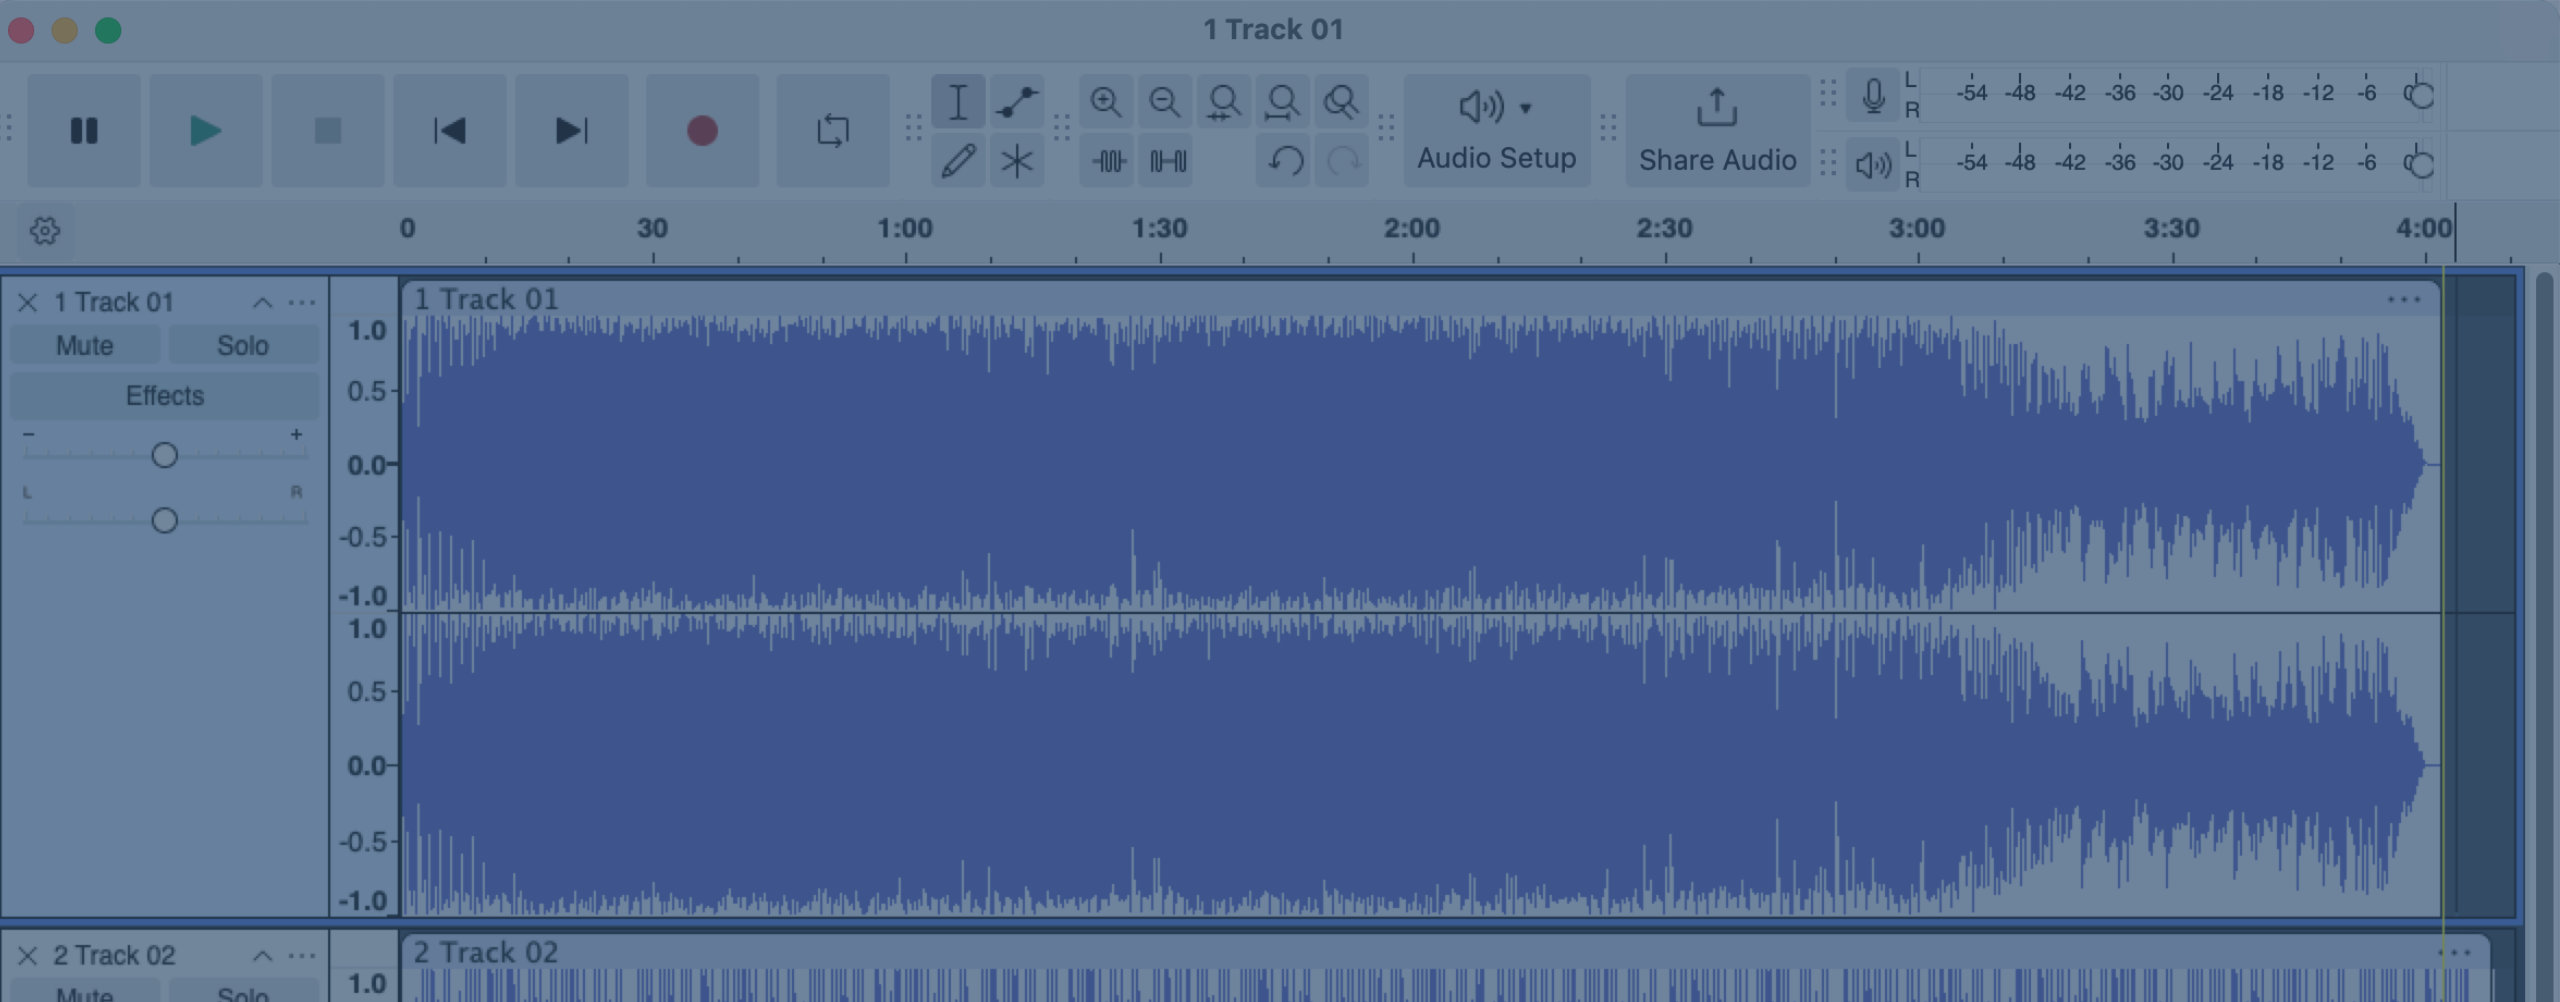
Open Audacity
![]()
Launch Audacity on your computer. You probably don’t want to skip this one either.
Import the CD Tracks
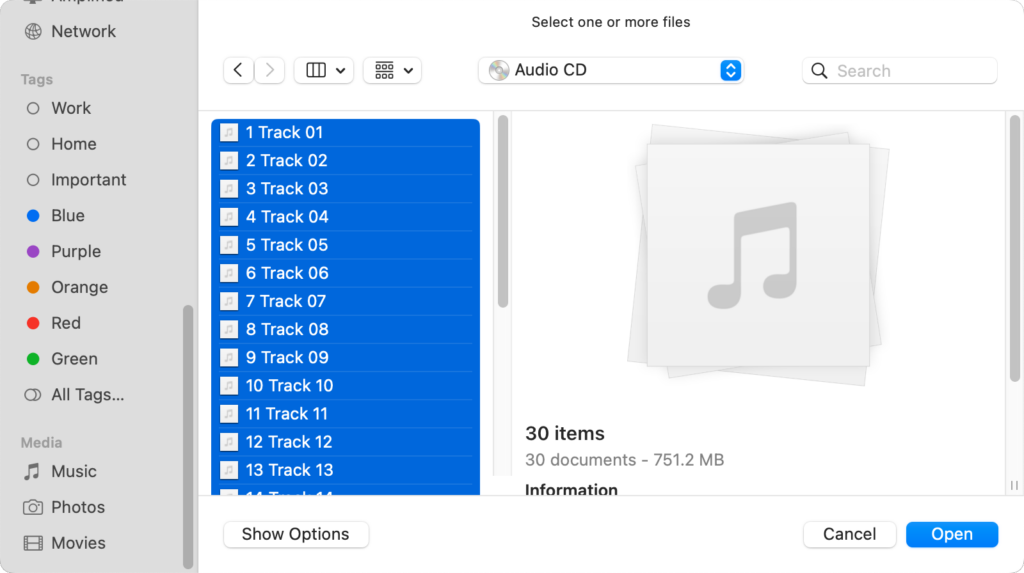
- Go to `File > Import > Audio`.
- Select the CD drive from the file dialog. This should list the tracks on the CD.
- Select the tracks you want to import.
- Click the ‘Open’ button.
This will open the each selected files as separate tracks in Apple’s Audio Interchange File Format (AIFF).
Edit the Tracks (Optional)
You can edit the imported audio files in Audacity if needed (e.g., trimming, adjusting volume). NOTE: Renaming the individual tracks will change the filename of the saved FLAC file (if you choose the “Export Range: Multiple Files” export option).
Edit the Metadata
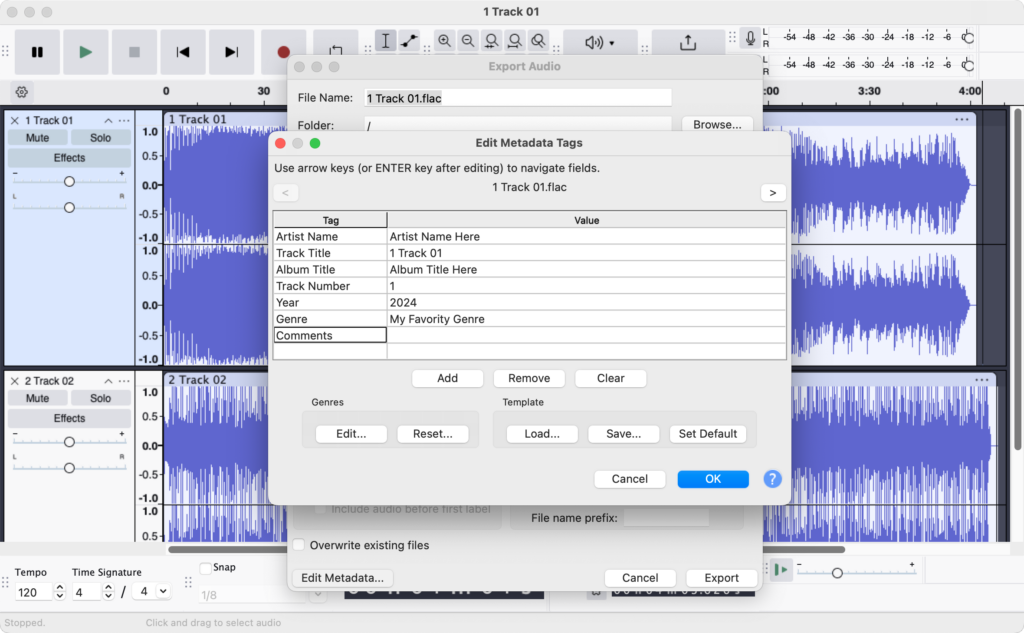
If you want to edit additional metadata bout each FLAC file, click the “Edit Metadata…” button and edit the metadata fields. You can use the left and right arrows to navigate between tracks. Pro Tip: You can temporarily switch to “Export Range: Entire Project” option to edit fields for all the tracks at once. Any field you don’t edit will retain it’s individual value.
Export as FLAC
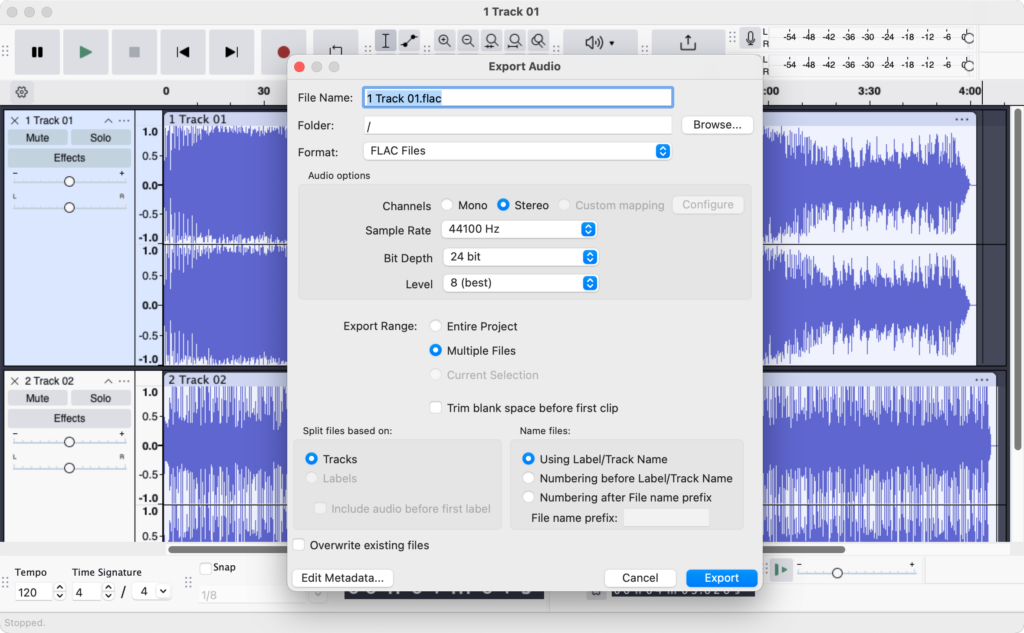
- After editing (if necessary), go to `File > Export > Export as FLAC`.
- Choose your desired settings (e.g., bit rate) in the export dialog.
- My preferred Settings:
- File Name: This will be ignored when using the “Export Range: Multiple Files” option described below
- Folder: Click the “Browse…” button and navigate to the folder where you’d like to save your FLAC files
- Format: FLAC Files
- Channels: Stereo
- Sample Rate: 44100 Hz
- Bit Depth: 24 bit
- Level: 8 (best)
- Export Range: Multiple Files
- Split files based on: Tracks
- Name files (If the track names already have numbers in them): Using Label/Track Name
- Name files (if the tracks aren’t already numbered): Numbering after File name prefix
Save the Project (Optional)
Save your Audacity project if you want to retain your edits by going to `File > Save Project`.
Check Your Files
Navigate to the destination folder you chose for exporting and ensure your FLAC files are present and properly encoded.
You’re done! You should now see a folder full of the most beautiful FLAC files you’ve ever seen in your life!